


Have you ever asked Doug for advice on what to plant in your plots? I’d bet money I know what the first thing he’d ask you is.
“Did you do a soil test? What’s your PH?”
Ummm…
Not sure? Not sure how to find out? Don’t worry, we got you.
Soil tests are so important to the success of your plots. They spell out for you exactly what you need to get the groceries you’re looking for. Even the freshest of seeds won’t grow to it’s full potential if soil conditions aren’t juuuuust right. Instead of guessing what your soil might need, wouldn’t you feel better if you knew EXACTLY what it needed? That’s where soil tests come in. Here we’ll explain everything you need to know and do to collect a soil sample and send it in for analysis.
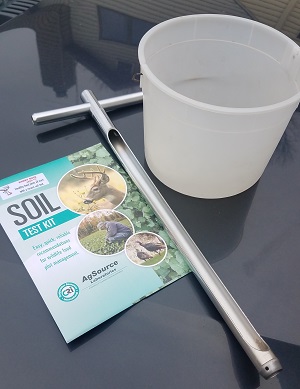
What you’ll need:
- Soil test kit (which you can get more info about here)
- Soil probe/section of pipe/shovel
- Bucket
You’ll only need to take the bucket and the soil probe/shovel when you head out to your food plot site. We suggest you take a minimum of five samples from each food plot site: one from each corner and one from the center. You will put all five of these samples into the same bucket, mix them together, and then take some of that soil to submit for your sample for that plot location. Do NOT mix samples from multiple plot sites, though.
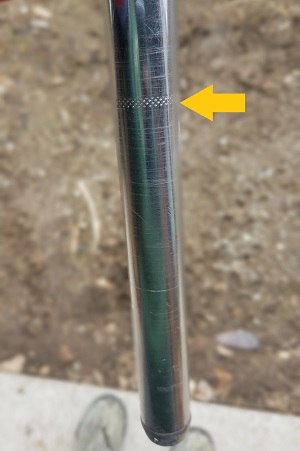
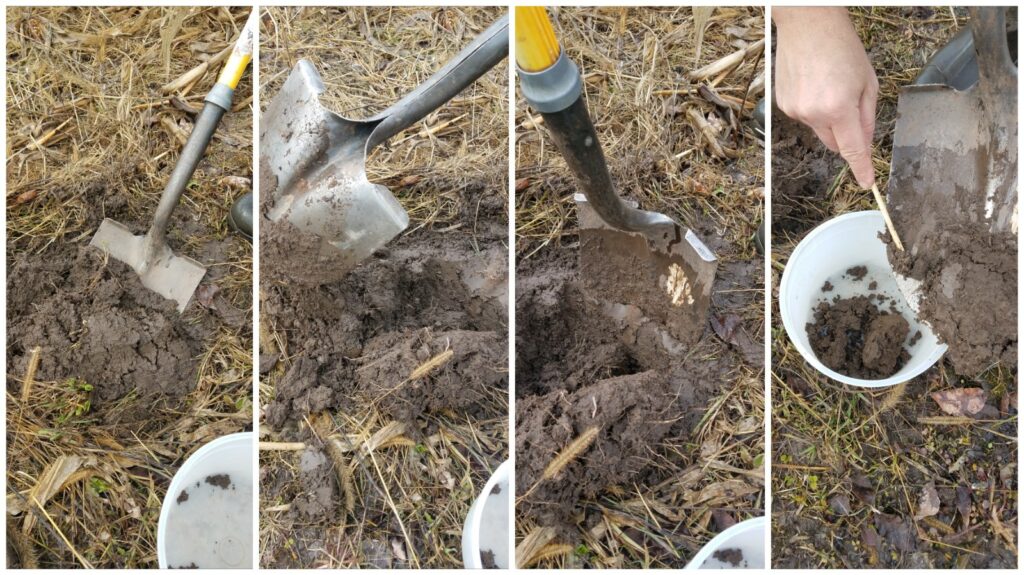
You’ll want to go about 4-6 inches into the soil to collect your samples. If you’re using a soil probe, it will likely have marks on the back side that you can use for reference.
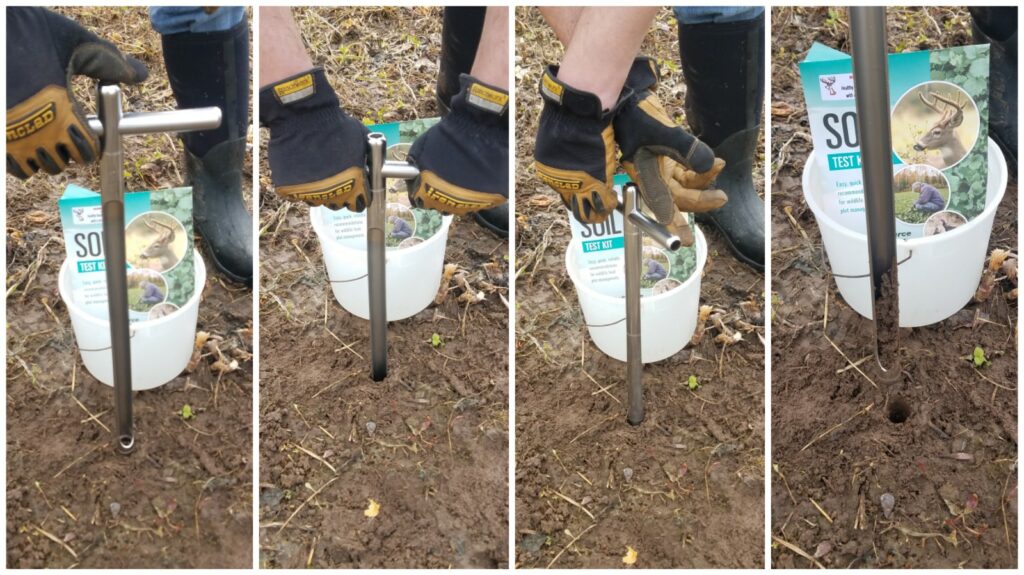
First, clear away debris from the area you’d like to collect a sample from. Then, push your soil test probe into the soil, give it a twist, and pull it back up. Finally, knock that soil out into your bucket using a stick, and move onto the next spot. Once you’ve done this five times for that plot site, you have your full soil sample for that location.
Don’t have a soil test probe? No worries, you can accomplish the same thing with a shovel. Ideally, we suggest doing this with something like a garden trowel, but you can make it work without. Basically, you just shovel out a small hole, then scrape the edge of the hole with the shovel. Then place a length of that sample into your bucket. Repeat four more times.
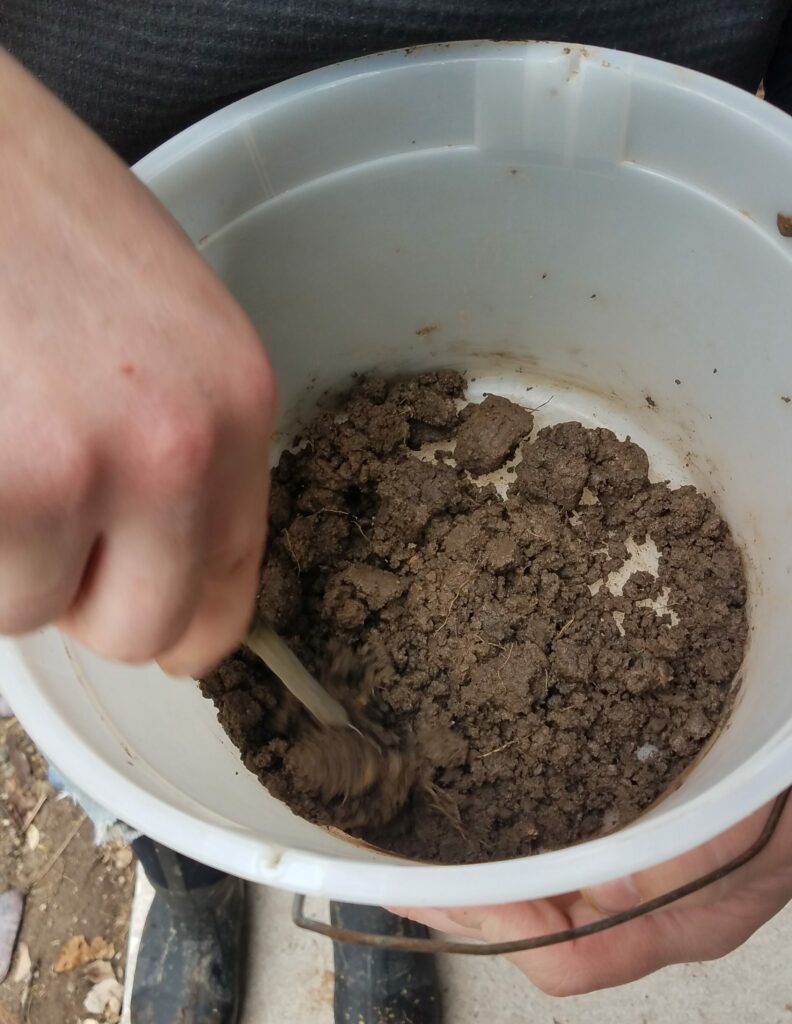
Once you have all your individual samples from one food plot in your bucket, go ahead and stir it all up. You will then take a portion of this entire sample and submit it for testing.
Essentially, what you’re submitting is an average for the entire plot site. Remember that this is just for one location; be sure to not combine individual samples from multiple sites. This could drastically skew your results.
How to Submit the Soil Sample
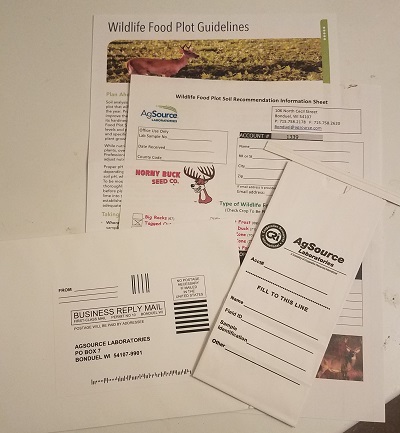
Ok, so now you’re ready to send in your soil sample. Remember that test kit? When you open that up, you’ll find two sheets of paper, a bag to put the soil in, and an envelope to put the sample bag and paperwork in for mailing.
Now you’re going to need to fill some paperwork out. You’ll notice that some of the fields on the soil sample bag and the information sheet match up. For example:
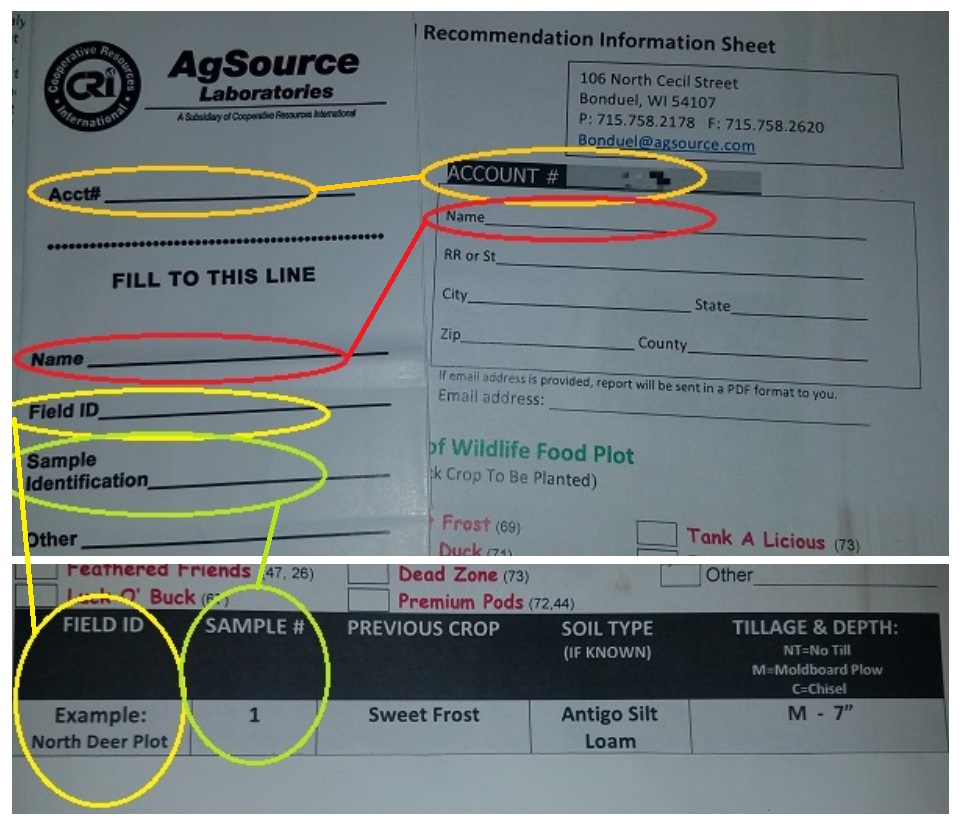
It’s pretty self explanatory. An account number will be listed on the form; write that number on the first line of the soil sample bag. Include your name. Be sure to come up with a name for the plot location (Bob’s plot, or Plot A, or whatever you want to call it). You’re sample ID will be 1 unless you had a 5+ acre plot that you divided into smaller sections.
You’ll also notice on the information sheet there’s a section to check off what you intend to plant in that plot next. If you know, great! Mark it off and you will get specific recommendations for that seed blend in your results. If you’re not sure, just check Big Racks.
For the sections “Previous Crop,” “Soil Type,” and “Tillage & Depth,” if you don’t know, it’s ok to leave them blank.
That’s it! Include your $18 cash or check in the envelope with the information sheet and soil sample bag, and drop it in the mail! You can expect your results soon!
So to recap…
- Get a soil test kit
- Grab a bucket and a soil probe, pipe, or shovel
- Collect appx. 5 samples from a food plot site, going 4-6 inches into the soil
- Combine those 5 samples in the bucket
- Fill out the paperwork in the test kit
- Put your soil sample into the sample bag
- Put the sample bag, information sheet, and $18 into the mailing envelope
- Mail it!
- Repeat this process for each of your food plot locations
We’ll explain how to read your results in an upcoming post. In the meantime, if you still have questions, leave us a comment on this post!
Got more specific questions? Join us April 26 at Stadium View in Green Bay for a night of food, drinks, prizes, and food plot knowledge. Reserve your spot here.
Hey, thanks for sticking around to the end! Use code HB10OFF for 10% off your next order. Happy shopping!