Tag Archives: mineral

Start Planning to Shoot Your Next (or First!) Booner with Booner Max Mineral

The Scoop on Mineral

Some people like to use mineral supplements to help deer survive the winter. Some just want to attract more deer to their property. And of course, everyone hopes it will help them grow bigger bucks. But not all mineral supplements are created equal. Here, we’ll breakdown some of the top factors when considering your mineral options and how to best use it.

Why is Mineral Important?

It may seem obvious, but deer are a lot like us in that they get their nutrition from what they eat. Unlike us, though, their choices are much more limited, especially in the winter months. Even with access to a variety of foods, we know that we as humans still have nutritional gaps, so we often take supplements. To help cover those nutritional gaps for deer, this is where mineral supplementation comes in.

While most people think of mineral as a way to help bucks grow bigger antlers, we take a broader-picture approach. Those big bucks start out as little bucks, which start out as fawns. By supplying high-quality mineral to your entire herd in the winter and early spring, you’re not only assisting the health of your bucks AND does; you’re also giving fawns a jump-start to their development. This will then lead to both bigger-antlered bucks this year as well as establish a great foundation for a healthier herd in the long term.

Why use Booner Max?

If you’ve purchased mineral before or looked at the ingredients, you’ve probably seen that salt is often one of the top ingredients. In fact, many people just look for salt rocks, blocks or “licks,” knowing that the salt alone will draw the deer in. While salt is important for attracting deer, it offers little nutritional value on its own. Our Booner Max mineral contains 17.5-20.5% salt content, leaving room in the bag for more important minerals like calcium, phosphorus, magnesium, potassium, and more. If you’re using mineral with over 30% salt content, you’re missing out on providing your deer with better nutrition during the critical winter months. 

Booner Max was formulated with the help of wildlife biologists and tested in controlled environments. In addition to a wide variety of minerals, Booner Max also includes sea kelp to reduce and regulate the deers’ body temperature, and probiotics to help them digest and utilize those minerals to maximum efficiency. This combination makes a major difference in deer health and antler growth. Our customers have seen as much as 30-40 inches of antler added year over year from 3 ½ to 4 ½-year-old bucks in the wild. Oftentimes bucks will produce additional tines, split tines, drop tines, and stickers galore at the base of the antlers that were not there at all in previous years. Besides bigger antlered bucks, you can expect to see a healthier-bodied herd as a whole, too.

Tips for Using Booner Max

State and local laws vary, so please be sure to check your regulations before placing mineral.

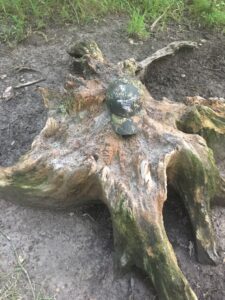
Our ideal recommendation is to locate an area near water and a bedding area. Find an old stump to pour it on/in, and pour 25 lbs at that location. Alternatively, you could simply clear any vegetation, dig a shallow hole or loosen some dirt and mix the mineral in. The amount of mineral sites is dependant on the size of your herd, but a good rule of thumb is two mineral sites for every 40 acres. To optimize antler growth, winter and early spring are the most critical times to supply mineral to your herd and is also when you will see the most mineral consumption. We recommend replenishing your mineral sites twice a year – you can replenish more often as needed. Again, laws vary from state to state and even county to county, so please be sure to check that you’re in compliance with your area’s laws before placing any mineral.

Incorporating mineral sites is a great way to enhance your current land management strategy. Are you ready to start growing the booners of the future on your property? Get your Booner Max today!

Healthy Herd Road Map: A General Food Plotting Timeline

Photo by Annie Spratt on Unsplash

When it comes to food plots, we get a lot of questions about what to do, when. And we get it! It gets confusing. There’s spring plots and there’s summer plots; there’s small kill plots and there’s big food plots. All of these need to be handled differently. And then there’s soil tests, weed control, fertilizer, what KIND of fertilizer… oof!

It’s ok. We’ll walk you through a basic timeline, and then over the next few months we’ll dive deeper into some of these specific steps. Refer back to this as the year goes on to stay on track with your plotting plans. *Note* We do realize this may vary based on where you’re located. If you have specific questions, don’t be afraid to reach out.

Winter/Early Spring

  • Mineral/Supplemental Feeding – If you’re somewhere where you can put out mineral or other supplemental feed, we highly recommend that you do. This can help alleviate stress on the deer during times of low food sources. (Be sure to check your local game laws.)
  • Pick new potential Food Plot/Kill Plot sites – take advantage of the snow for finding trails and bedding areas. Use that information to pick new plot sites (if you need them); keep in mind access to these locations and prevailing winds during hunting season. Note: when we say food plot, we’re talking a minimum of 2 acres; kill plots, under 1 acre.
  • Soil testing – As soon as you can. Please, please do not skip soil testing! The results from your soil test are your guide to food plot success. By skipping soil testing and fertilizing according to the test’s results, you will be losing out on your food plot’s potential.
  • Frost seeding – Wait until the snow is gone and some of the frost has come out of the ground. Seeding too early means it will sit on top of the snow or frozen ground, which means risking that most of it could become bird food. We recommend frost seeding clover such as our Luck O Blend; most of our other blends should be planted later.

May

  • Soil testing – If you haven’t done it yet, May is still a good time. You can still get your results with enough time to prepare for what you may need to add to your soil.
  • Weed control – Just because your plot looked brown and dead in April doesn’t mean the weeds aren’t there. Your seed doesn’t stand a chance if it’s going to be competing with weeds, so make sure you’re eliminating those as much as you can.
  • Ag-lime – If you plan to use ag-lime, now is a good time to start applying it. Apply it too soon, and it may wash away with rain. Apply it too late, and it won’t have time to start working and impact your seed growth. A great alternative? Liquid Lime.

June/July

  • Continue with weed control, as needed
  • Apply ag-lime, as needed
  • Mow any clover plots – if you frost seeded clover in early spring, you’re going to want to mow that when it blossoms.

July/August

  • Fertilize – You want to try to fertilize as close to planting as you can so the fertilizer can be used by the seed, not washed away.
  • Plant! –  Ideal timing is 60-80 days before a killing frost. Planting too early means your plots will likely be there and gone before hunting season even opens. Be patient! We promise it’s worth the wait.

Of course, fertilizing and planting are not just two simple last steps and then you’re done. There’s disking, rolling, and making sure you’re not over/under seeding too. Equipment varies, as does the blend you’re planting; we’ll get into those details in another post.

Simple enough, right? Just remember, once you have a location established, the key steps are these: soil test, weed control, fertilize, plant. Oh, we almost forgot…

Fall – Shoot a Big Buck!

Big buck walking through an HB Seed food plot

Got more specific food plotting questions for Doug? See the full schedule of upcoming seminars here. Or simply comment on this post!